Owner's Manual
Create an account
-
Open lagunaresorts.ph in your browser

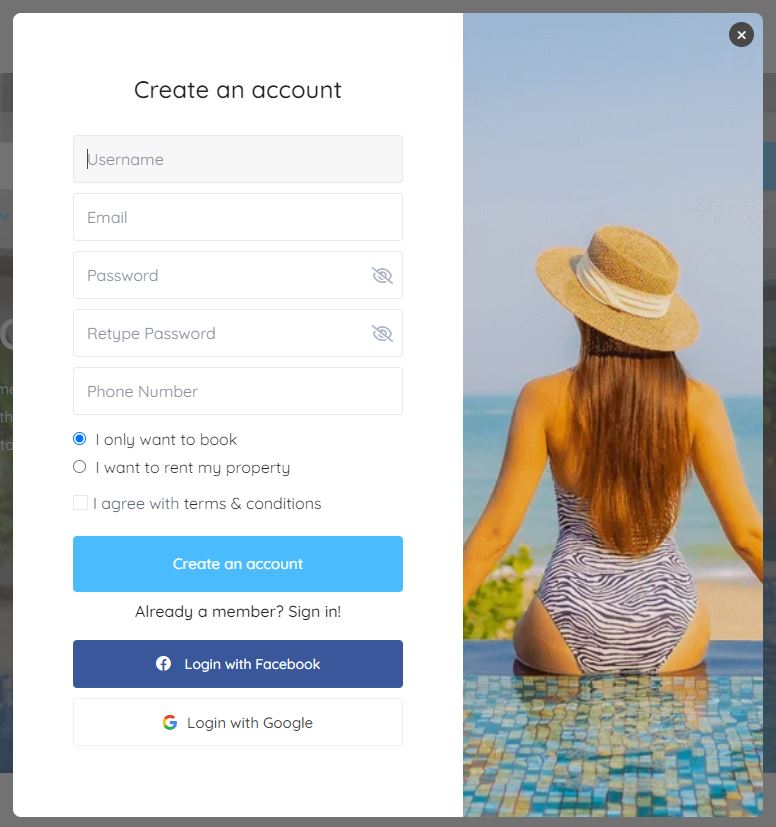
- Click the “Sign Up” icon on the upper right part of the page.

- Fill out the fields. Note that the system will require a unique email.
Select the option “I want to rent my property” and tick the “I agree with Terms and Conditions.
Then click “Create an account”.
You also have the option to create an account using your Facebook or Google account.
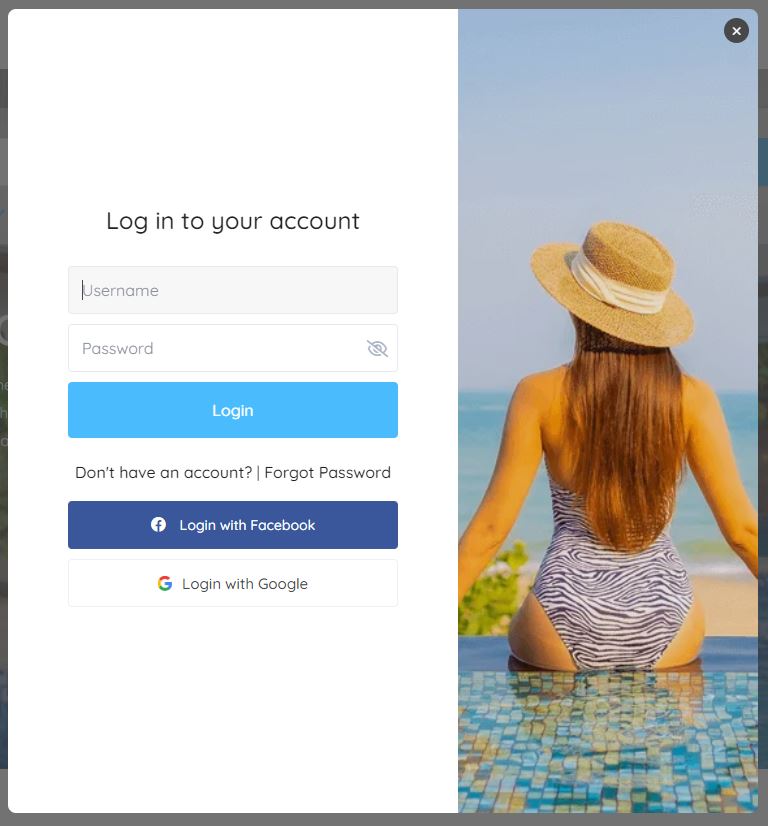
- If the account has been successfully created, you can start logging in using your new account.
Complete your profile
- Log in to lagunaresorts.ph. You will land in your Dashboard.

- On the left bar, click My Profile and fill out your details.
Please ensure that your mobile number is in the correct format. This will be used for SMS notifications.
Some of the information here will be included in the Listing Profile and will be made available to prospective guests. This includes your Name, About Me, website, and social media accounts. Other contact details will be used during transactions.
-
Click Update Profile to save your changes.
Create a listing
-
- Log in to lagunaresorts.ph. You will land in your Dashboard.

- Click “Add New Listing” in the left panel.

- Enter Description. All information provided here can be seen by prospective guests except for the Private Notes .
- Enter the Title or Property Name. (e.g. Homesque Resort)
- Select Category (e.g. Private Resort, Events Place, etc.)
- Enter the Guest No or the guest capacity. This is a searchable criteria. Check if you will allow guests above capacity and indicate by how many.
- Select City and Barangay. This is a searchable criteria.
- Select Country.
- Enter the Property Description to describe your listing. You can highlight key differentiators of your property.
- Indicate if you will allow instant booking. When the Allow instant booking is enabled, a guest who books your listing will proceed to payment to confirm their booking. It does not require the Property Administrator to approve the booking.
If the Allow instant booking is not enabled, the Property Administrator has to confirm the booking request so the system can send a payment request to the guest.
TIP: To allow instant booking, all property bookings must be synchronized or reflected in your Listing Calendar to avoid the inconveniences of double booking. Use the Import/Export section in the Calendar settings to synchronize with external calendars. You can also perform the Create Manual Booking process to reflect bookings confirmed outside the portal.
- Log in to lagunaresorts.ph. You will land in your Dashboard.
- Click Continue.
- Enter Private Notes, if any.
- Enter the Check-in Message, which contains your check-in instructions. This information will be sent to the guest as part of the Trip Details.
- Click Save and Next or Go to Price Settings.
Enter Listing Price.
- Enter the Price per weekday.
- Enter the Price per weekend.
- Enter Extra Charges. You can add additional charges on top of your base price (e.g. Cleaning Fees, Extra Hour Fees, Peak Season Fees, Extra Room Fee, etc). When guests opt for these services, the additional charges will be included in the payment request calculation.
- Click Save and Next or Go to Media settings.
Enter Listing Media
- Click Select Media to upload property photos. You can reorder the uploaded images through Drag and Drop.
TIP: Only photos in .jpg, .png, .jpeg format are accepted by the system. The system also automatically compresses the file size to manage storage requirements. Upload photos that best showcase your property.
- Enter Property Video links from either Vimeo or YouTube, if available.
- Enter Virtual Tour, if available, by pasting the iframe code.
- Click Save and Next or Go to Details setting.
Enter Listing Details
- Enter the Size in square meters.
- Enter the number of bedrooms.
TIP: If your property can be rented with a range of number of rooms, you can enter a range. In the Price setting, your price should be set at the minimum number of rooms and the additional rooms can be set up as Extra Charges.
- Enter the number of bathrooms.
- Enter the Custom Details
- Enter the Terms and Conditions.
- Select the Standard Check-in and Standard Check-out Time (Mandatory fields)
- Enter the Cancellation Policy, if any.
- Indicate if Smoking Allowed.
- Indicate if Pets Allowed.
- Indicate if Parties Allowed.
- Indicate if Children Allowed.
- Enter Other Rules.
- Click Save and Next or Go to Location settings.
Enter Listing Location
- Enter the Listing location details (i.e. Address, ZIP Code, Province/State).
- Place the listing pin on the map
- Enter the Latitude and Longitude for the map’s pin position.
- Click Save and Next or Go to Amenities and Features
Enter Amenities and Features
- Tick the Amenities available on your property.
- Tick the Pool Details, if applicable.
- Tick Other Features available on your property.
- If there are Amenities or Other Features that you would like to add, please contact our System Administrator. We can add them to the list.
- Click Save and Next and go to Calendar settings.
Enter Calendar Settings.
- Export LR Calendar. If you maintain an external calendar, you may export your LR calendar so you can have a combined view of your bookings. The iCal URL is provided by the system in the section highlighted below.

- Import LR Calendar. You can also import your external calendar into the system. You can set it up in the section highlighted below.
Accept a Booking
When the Allow instant booking is disabled for your listing, the Property Administrator receives email and SMS notifications when a guest makes a booking request to prompt him/her that a booking request is for approval.
- To review the booking in the system, go to My Bookings.
- Scroll until you find the booking for review.
TIP: Bookings for review have the Issue Payment Request button.
- To review, click the Issue Payment Request. The booking details will be shown. Add applicable extra expenses/charges.

- To approve, click the Send Payment Request. The system will notify the customer that his booking request has been approved so he/she can proceed to payment.
Reject a Booking
When the Allow instant booking is disabled for your listing, the Property Administrator receives email and SMS notification when a guest makes a booking request to prompt him/her that a booking request is for approval.
Only unpaid bookings can be rejected. For fully paid bookings, the procedure is to cancel a booking.
- To review the booking in the system, go to My Bookings.

- Scroll down until you find the booking for review.

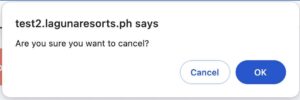
- Click Reject Booking Request. An alert will be shown to confirm if you want to cancel the booking. Click OK if you are sure of the booking to reject. Otherwise, click Cancel.

Cancel a Booking
Booking cancellation is highly discouraged. However, there are acceptable scenarios where a resort owner may cancel a booking.
Only paid bookings can be canceled. If unpaid, the process is to Reject a Booking.
- To review the booking in the system, go to My Bookings.

- Scroll down until you find the booking for review.
- Click Cancel my booking. An alert will be shown to confirm if you want to cancel the booking. Click OK if you are sure of the booking to cancel. Otherwise, click Cancel.

Create Manual booking
A resort owner or property administrator creates a manual booking to block off dates in the calendar, either due to bookings performed outside the platform or for various reasons. The purpose of this process is to update the listing calendar and inform potential guests that these dates are no longer available. When creating a manual booking, the status of the booking is Confirmed/Not Fully Paid.
- Go to My Listings
- Click the calendar icon for the listing, as pointed in the arrow below.

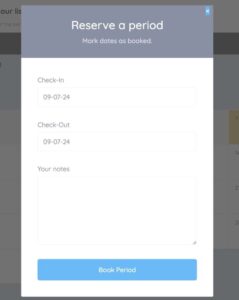
- Double-click on any date to launch the Reserve a period pop-up window.

- Enter the dates you want to mark as booked.

- Enter notes to provide information about the booking.
- Click the Book Period button to save. The system will generate standard notifications. The system will block the dates and the booking status is Confirmed/Not Fully Paid because the transaction was not paid through the system.
Delete Payment Request
This process is performed if the owner or Property Administrator wishes to recall an issued payment request, either to modify the payment request or to delete it before rejecting the booking.
- Go to My Bookings.
- Find the booking where you want to delete a payment request. Click Delete Payment Request.

- The system will prompt you to confirm your delete request.

- Click ok to delete.
- Refresh the screen by clicking the icon below.
The status of the Booking is changed from Payment Request Issued to Pending and the Issue Payment Request is shown.


